
Dialling in laser power and speed is the difference between a crisp, repeatable result and a wasted sheet of material.
Today’s Day 5 release adds a Material Test Grid to Light Lane: a fast, visual way to generate a calibration grid that sweeps through a range of power and speed settings, so you can find the sweet spot for your material and your machine.
If you’re tired of guessing, this is the feature.
What is a Material Test Grid?
A material test grid is a structured calibration pattern where each square (or “patch”) is engraved with a specific combination of:
- Power (low → high across columns)
- Speed (fast → slow across rows)
- Optional spacing and positioning controls so it fits your work area
Instead of changing settings manually, running multiple jobs, and losing track, you run one job and get a clear grid you can reference forever.
What’s new in Light Lane today
1) Generate a full calibration grid in seconds
Pick your grid size and ranges:
- Columns / Rows
- Patch size
- Gap between patches
- Min/Max power (0–100%)
- Min/Max speed (mm/min)
- Line spacing for consistent test density
- Choice between M4 (dynamic) and M3 (constant) power modes
Light Lane generates the full job automatically and keeps everything readable and controlled.
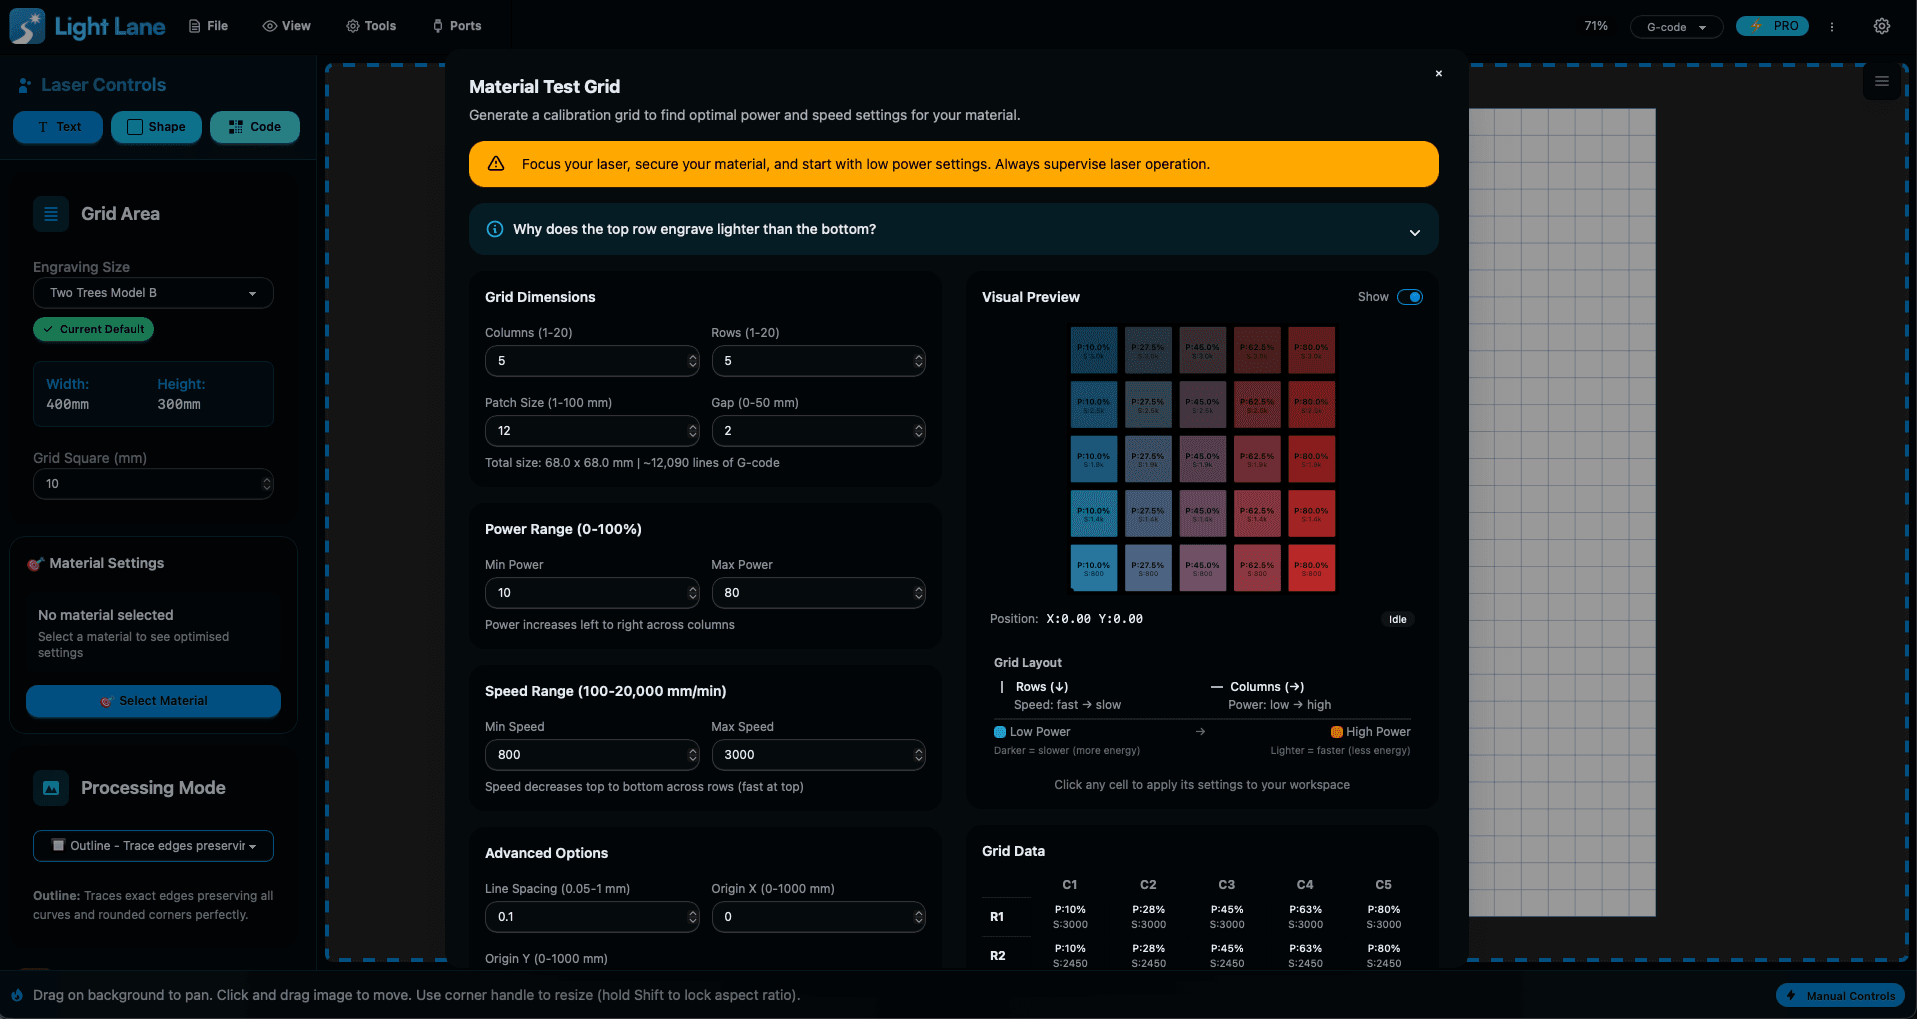
2) Visual Preview before you burn anything
Before you hit the laser, you get a Visual Preview of the entire grid so you can sanity-check:
- layout and dimensions
- direction of power and speed changes
- labels on each patch
- overall job size vs your machine area
This massively reduces “send and pray”.

3) Click-to-apply settings from the preview
Once you’ve engraved the grid, the best part is what happens next:
- Click the square you like in the preview
- Confirm “Apply these settings”
- Light Lane instantly applies that power + speed combo to your current workspace
No re-typing numbers. No guessing what square was what. No notes app.
4) Send straight to your laser
You can generate the grid and send it directly to your machine for a smooth calibration loop.
Why this matters (especially for repeatable results)
Every material batch is different. Even the same “type” of plywood can behave differently depending on:
- moisture content
- glue density
- coating/finish
- air assist and focus accuracy
- diode output variance over time
A test grid is the fastest way to stop arguing with the machine and start getting consistent output.
If you run a shop, this also becomes part of your workflow:
- new material arrives → run a grid → save the preset → consistent production
Tips for using the test grid effectively
- Start conservative: don’t crank power first run.
- Keep patch size big enough to actually see texture differences.
- Run grids per material type (ply, acrylic, leather, anodised aluminium marking spray, etc).
- Save the best square as a preset when you’re happy.
Free Trial available now
If you want to test this on your setup, you can grab the free trial and run a calibration grid today.
➡️ Download and try Light Lane: https://lightlane.app
More coming tomorrow
This is Day 5 of 12 Days of Light Lane and we’re shipping daily.
If you’re using Light Lane during the campaign, your feedback can directly influence what we build next.
See you tomorrow.