
Raster engraving is brutally honest.
If your source photo is too flat, too dark, or blown out, your engrave will be the same. That’s why Day 2 of 12 Days of Light Lane is a new built-in Image Editor, designed specifically for getting better, more predictable results when engraving photos and shaded artwork.
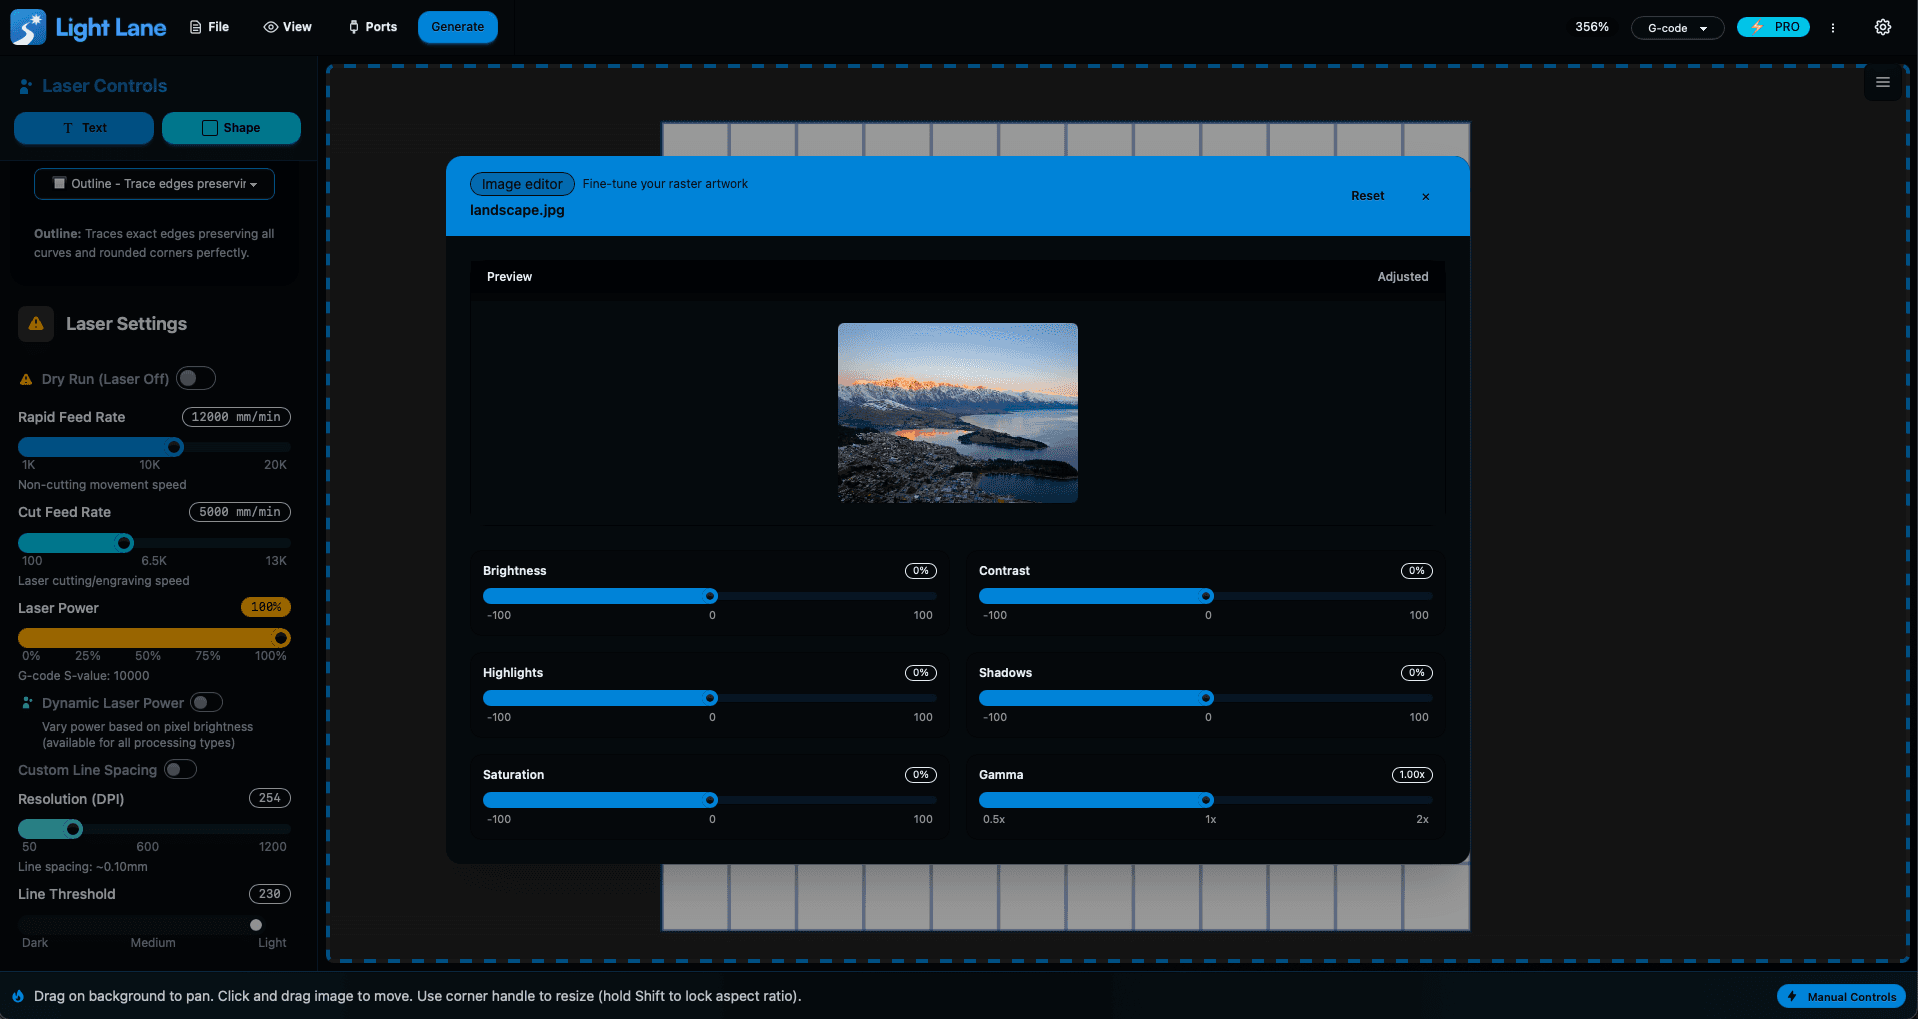
You can now fine-tune your raster image inside Light Lane with:
- Brightness
- Contrast
- Highlights
- Shadows
- Saturation
- Gamma
No exporting to other apps. No guessing. Just fast adjustments that directly improve how the final engrave looks.
Try it today with the free trial
Why this matters for laser engraving
Most “photo issues” aren’t actually the laser. They’re the image.
A tiny brightness or gamma tweak can be the difference between:
- a muddy, low-contrast engrave
- crisp detail in faces, fur, textures, and landscapes
- readable gradients instead of a grey blob
- better separation between dark and light areas
Light Lane’s Image Editor helps you quickly control that before you generate your job.
What you can do with the new Image Editor
Brightness and Contrast
Use these to get the overall image into the right range for engraving.
- Brightness controls the overall exposure
- Contrast controls separation between light and dark detail
Highlights and Shadows
This is the real “engraving fix” for photos.
- Highlights helps recover detail in bright areas (snow, sky, reflections)
- Shadows lifts detail in darker areas (hair, fur, clothing, backgrounds)
This is especially useful when the important detail is hiding in the midtones.
Saturation
Even if you engrave images in black and white, saturation can affect how some images convert and how detail comes through, especially with coloured subjects.
It can help tame weird colour dominance before your raster processing.
Gamma
Gamma is one of the most powerful controls for engraving.
It adjusts midtones without nuking the blacks or whites, which is perfect for:
- faces
- product photos
- gradients
- soft shading that needs to stay visible
Fast workflow: how most people will use this
A simple flow that works for most raster jobs:
- Drop in your image
- Open the Image Editor
- Adjust in this order:
- Contrast
- Highlights / Shadows
- Gamma
- Brightness last
- Close the editor and continue as normal
You’ll get better engraves with less trial and error, especially on photo-style jobs.
Built for beginners and power users
Light Lane is built so it can be easy when you want it to be, but still powerful when you need control.
The new Image Editor follows that vibe:
- Simple sliders for fast adjustments
- Fine-tuning tools that actually matter for laser results
- Designed for real engraving workflows, not “photo editing for Instagram”
12 Days of Light Lane: what’s next
This is Day 2, and there’s more coming every day up to Christmas.
If you jump in now, you’re early enough to influence what ships next. If there’s a feature you want, contact us. We're building this in public and moving fast.
- New feature every day
- Free trial available
- Holiday pricing is live right now
Start the free trial here
Read the updates here
Quick FAQ
Is this only for photos?
No. It’s great for photos, but it also helps with shaded logos, illustrations, and anything you raster engrave.
Does this change my original image?
Light Lane applies adjustments inside your project workflow so you can dial it in without destructive editing.
Does it work for all lasers?
If you engrave raster images, you benefit. Diode and CO2 users both get better results because the image quality still drives the final output.
Try it today
If you want cleaner raster engraves with less trial-and-error, give it a go.
Free Trial
12 Days of LightLane
Tomorrow’s update is already on the way.